How to Model Your Own Jewelry for 3D Printing
The intersection of digital fabrication and personal adornment has democratized design in ways that were unimaginable just a decade ago. Learning how to model your own jewelry for 3D printing is no longer a niche skill reserved for industrial engineers or CAD specialists; it is an accessible creative outlet for entrepreneurs, educators, hobbyists, and artists alike. When you master this workflow, you transition from being a passive consumer of mass-produced accessories to an active creator of bespoke wearable art. This shift offers profound value, whether you are looking to prototype a new product line for your Etsy shop, create personalized gifts, or simply explore the spatial reasoning required for additive manufacturing.
In this comprehensive guide based on the curriculum from Chipped Builds, we focus on removing the intimidation factor often associated with computer-aided design. Ashley’s approach demonstrates that professional-grade results do not require expensive software licenses or years of technical training. By leveraging Tinkercad, a free and intuitive browser-based platform, learners can bridge the gap between abstract ideas and tangible objects. The ability to visualize, manipulate, and export custom forms opens up endless possibilities for customization and rapid iteration that traditional jewelry making methods simply cannot match.
Why Tinkercad is the Ideal Starting Point
Many aspiring jewelry designers abandon their goals because they attempt to learn complex parametric modeling software too early. While programs like Rhino or MatrixGold are industry standards for high-end production, they present a steep learning curve that can stifle creativity. Tinkercad operates on a constructive solid geometry (CSG) workflow, which mimics the physical act of building with blocks or clay. You combine primitive shapes—cylinders, cubes, spheres—to create complex forms, or use "hole" shapes to subtract material. This tactile logic aligns perfectly with the mindset of jewelry makers who are accustomed to working with physical volume and negative space.
For professionals and educators, this accessibility translates directly to efficiency. When you understand how to model your own jewelry for 3D printing using simplified tools, you reduce the time from concept to prototype. Instead of spending weeks mastering vertex manipulation, you can spend hours iterating on designs. This rapid feedback loop is crucial for testing wearability, scale, and aesthetic balance before committing to more advanced workflows or expensive casting processes. Furthermore, because Tinkercad runs entirely in the cloud, it facilitates collaboration in classroom settings or remote teams without requiring hardware upgrades or software installation.
Core Techniques for Wearable Design
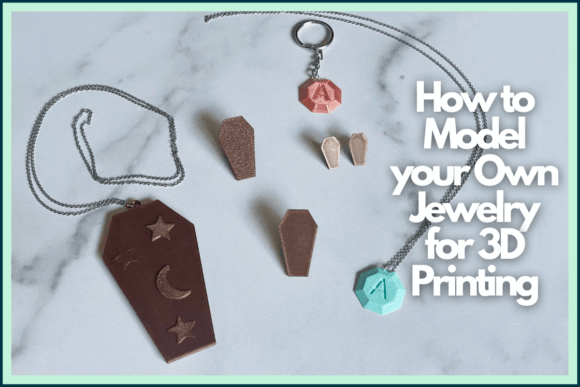
The class guided by Ashley from Chipped Builds moves beyond theoretical modeling to practical application through three distinct projects: two necklaces and a set of earrings. These projects are not arbitrary; they are selected to teach specific competencies required for successful 3D printed jewelry. Modeling for wearables differs significantly from modeling for static display pieces. You must account for gravity, skin contact, and the mechanical limitations of the printer.
Mastering Scale and Tolerance
One of the first lessons in modeling jewelry is understanding real-world scale. A pendant that looks elegant on screen may be uncomfortably heavy when printed in resin or PLA. Through the necklace projects, learners discover how to calibrate dimensions to ensure the piece sits correctly on the body. This involves creating custom chain loops and bails that accommodate standard hardware. A common pitfall for beginners is designing holes that are exactly the size of the intended jump ring; however, 3D printers have inherent tolerances. Successful modeling requires adding clearance offsets to ensure assembled parts fit together without forcing or sanding.
Designing for Printability
The earring project introduces critical constraints related to overhangs and support structures. Unlike sculptural art, jewelry often requires smooth surface finishes against the skin. Learning how to orient models to minimize visible layer lines or support scarring is a vital skill. Ashley’s guidance helps students identify which geometries print cleanly without supports and which require strategic angling. This knowledge saves material, reduces post-processing time, and improves the final user experience. For commercial creators, optimizing designs for printability directly impacts profit margins by reducing failure rates and labor costs.
From Digital File to Physical Object
Creating the model is only half the equation; exporting it correctly is where many projects fail. Understanding file formats is essential when learning how to model your own jewelry for 3D printing. Tinkercad exports primarily in STL and OBJ formats, which are the universal languages of 3D printing. However, resolution matters. Exporting at too low a polygon count results in faceted curves that look unprofessional, while excessively high counts can crash slicing software. Finding the sweet spot ensures that circular pendants remain round and intricate textures retain their definition.
Beyond file format, one must consider the destination manufacturing method. Are you printing directly in plastic, or are you creating a master pattern for silicone molding and lost-wax casting? Direct 3D printed jewelry often utilizes resin for high detail, but the design must include drainage holes if hollowed to prevent trapped uncured resin. If the goal is metal casting via wax-like resins, wall thickness becomes paramount. Too thin, and the burnout process fails; too thick, and porosity issues arise. The skills learned in this class provide the foundational geometric literacy needed to adapt designs for these various downstream processes.
Practical Applications Across Industries
The utility of these skills extends far beyond personal hobbies. For entrepreneurs and small business owners, in-house modeling capabilities eliminate reliance on expensive freelance designers for every minor variation. You can offer made-to-order customization, such as adding initials or adjusting sizes, with minimal overhead. This agility is a significant competitive advantage in the saturated accessory market.
Educators and STEM instructors find jewelry modeling to be an exceptional vehicle for teaching geometry, measurement, and engineering principles. Because the output is personally relevant and aesthetically pleasing, student engagement increases dramatically compared to abstract mechanical exercises. It transforms math into a tangible, wearable reward.
For marketers and brand managers, creating custom promotional merchandise or event swag in-house allows for tighter brand alignment and faster turnaround times. Instead of settling for generic catalog items, you can model branded pendants or charms that reflect current campaigns. Similarly, content creators and bloggers can develop unique visual assets and products that reinforce their personal brand identity, offering followers exclusive items that cannot be found elsewhere.
Evaluating Your Readiness to Start
Before diving in, assess your current resources and goals. Do you have access to a 3D printer, or will you use a service bureau? If printing at home, familiarize yourself with your machine's specific limitations regarding minimum feature size and bridging. If using a service, understand their design guidelines for jewelry-specific materials. Also, consider your post-processing capabilities. 3D printed jewelry rarely comes off the build plate ready to wear; it requires washing, curing, sanding, and potentially tumbling or painting.
Ultimately, learning how to model your own jewelry for 3D printing is an investment in creative autonomy. The barrier to entry has never been lower, thanks to free tools like Tinkercad and structured guidance from experts like Ashley at Chipped Builds. Whether you aim to launch a business, enhance your teaching curriculum, or simply enjoy the satisfaction of wearing something you designed from scratch, the skills acquired here form a robust foundation. Start simple, respect the physical constraints of the medium, and allow the iterative nature of digital fabrication to refine both your designs and your understanding of form.